Add Another Account and Create a System Restore Point
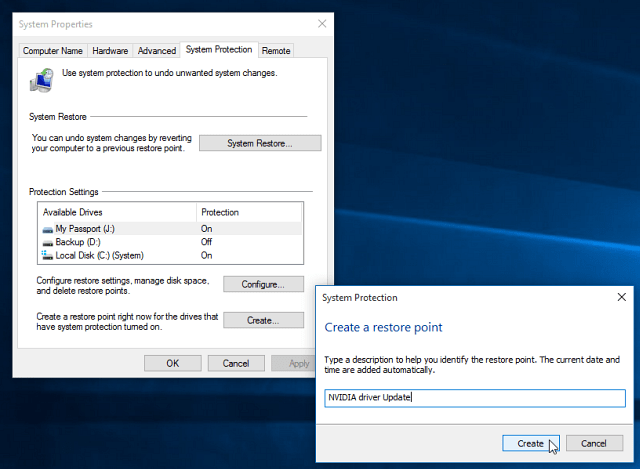
Creating a backup account is important as this can be used to troubleshoot and diagnose issues with the operating system but also applications and drivers. Consider this to be your system administration account. Only use it when you need to do troubleshooting. You can learn more in our article: How to Create a Local Account in Windows 10 You reached the desktop, Windows 10 is functioning fine; but before you move on to another activity such as installing drivers or applications, you should create a System Restore point to avoid losing all that time invested upgrading to Windows 10. System Restore points save you the trouble of having to start over if something were to go awry. For more on creating one read our article: How to Enable and Create a Windows 10 System Restore Point.
Install the Latest Windows 10 Updates and Check Device Manager
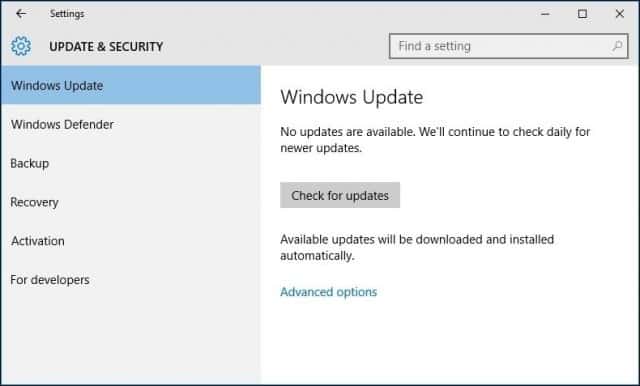
Between RTM and general availability, there might be improvements released that will make your computer perform better. Windows Update will also provide security and driver updates.
Whether you did an in-place upgrade or clean install, check the Device Manager to see if a component was not installed or not working. To do that, hit Windows key+X and select Device Manager. If there is an exclamation, right-click the device and then Update.
If Windows doesn’t find any available updates, go to the PC manufacturer’s website and look for the driver. Most manufacturer sites make it easy to get the right drivers, then again, some don’t. If that’s the case, here’s a cool tip. Right-click the device and then select Properties. Under the Details tab, Click in the Property list box and select Hardware Ids from the drop-down menu. Then copy the entry in the value box and use your default browser to search for a suitable driver and install it.
The most common drivers Windows will need after a clean install are:
Chipset driver (if you built your computer, you should have a motherboard disc that came with it).Video/Display AdapterWired/Wireless LAN Adapter
Install and Update Desktop and Store Applications
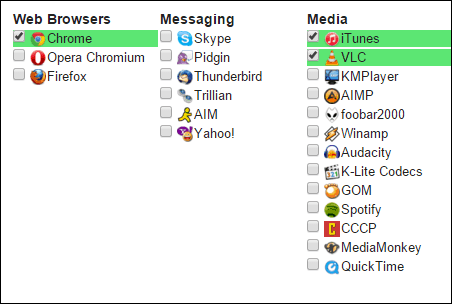
Windows 10 comes with a lot of built-in apps, but I am sure you have some favorites you would like to install. A great place to install your essential free desktop programs from is Ninite. You just check the ones you want, download an installer file, and it will install everything without any toolbars or extra crapware that you don’t want.
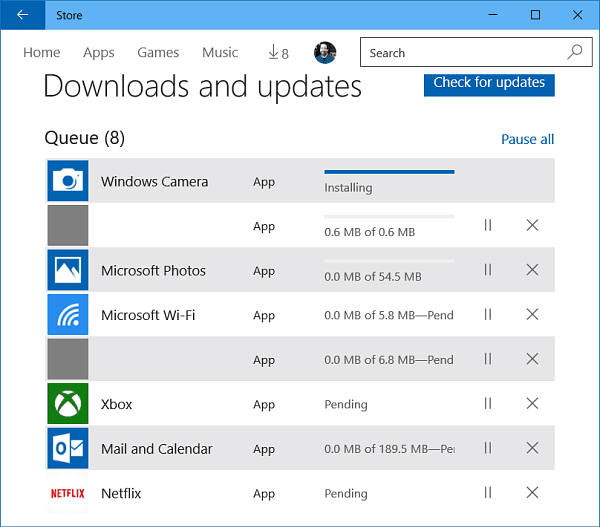
Developers will provide updates and enhancements to their apps from time to time. While universal apps are set to update in the background by default, after installing Windows, you should get ahead of the game. To check for updates to your apps, launch the Store and click the Updates menu which will indicate how many updates are available. The store indicates I have 26 app updates available.
You will see a list of updates that are available. If you are on a slow connection, you can click Pause all and select just the apps you want to update by pressing the Play button or remove it from the queue if you don’t want it all.
Adjust Screen Resolution
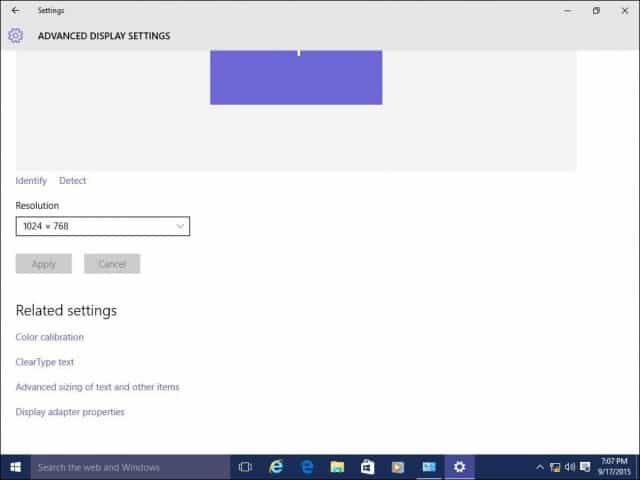
Some people like things bigger or smaller on their screen. To customize your display, go to Settings > System > Display. Then under Change the size of text, apps, and other items. Move the slider to what works best for you, then make sure to click the Apply button at the bottom of the screen. If you want to change how much space you have on screen, select the Advanced display settings link at the bottom.
Click in the Resolution list box and change it to what works best for you. Typically the best setting is the maximum resolution of your monitor(s). If your screen resolution does not have the option to be adjusted, you likely need to update your display driver.
Also review:
How to Manage Virtual Desktops in Windows 10
Personalize Start Menu, Lock Screen, and Desktop
Windows 10 introduces a revised modern configuration app called Settings. It includes familiar functions that are available in the classic desktop Control Panel that you have been using in earlier versions of Windows. Some of the things you can use Settings for include changing window colors, install themes, manage installed programs, update Windows, connect to networks, adjust time and language, configure hardware and a myriad of other tasks. To personalize the Start menu and window color accents go to Settings > Personalization and click the Color tab and select a color choice you like. You can even have Windows automatically choose a color for you. Scroll down, and you will see additional settings you can choose such as the parts of the interface you would like colors to be applied and the ability to make the Start menu and Taskbar transparent.
If there are more granular options you would like to apply, click the Themes tab and choose from the available options. Here you can adjust sound, icons, and mouse pointers.
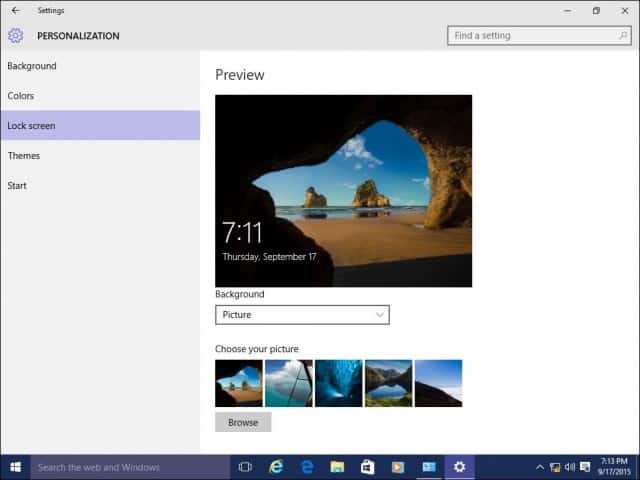
When you start your Windows 10 PC, you are first greeted by the lock screen, a picture that hides your sign in screen. You can customize this picture by using an image from your personal collection or one of the stock photos bundled with Windows. Click the Lock screen tab. Here you’ll see the default background which Windows uses. To customize it, click in the Background list box. Click Picture, then click a picture you would like to use or click Browse and choose a picture from your picture library.
Pin Often Used Items to Start Menu
If there is an area of Settings you commonly access, you can access it even faster by pinning a shortcut on the Start menu. Just right-click the tab and click Pin to Start. You will now be able to quickly access your favorite Setting quickly from the Start. Here are some great references for how to pin items that you often use to the Start menu:
Pin Specific Settings to Start menuPin Websites to the Windows 10 Start menuPin Favorite Songs and Playlists to Windows 10 Start menu
One of the missing puzzles in Windows 8.1 was the inability to place a shortcut for Universal apps on the desktop. You’ll be happy to know that you can do this now in Windows 10. To pin a shortcut to the Start menu or Taskbar, right-click the application from the All Apps menu then click Pin to Start or Taskbar. Adding a shortcut to the desktop requires a simple drag and drop action.
If you want to add system icons to the desktop, read our article on how to add or remove system icons on the Windows 10 Desktop.
Reclaim Disk Space After Upgrade
You don’t have to do this right away, but if you want to recover lost disk space, you can. Please keep in mind; the Windows.old is kept around in case you need to rollback to your previous version of Windows. This will be done automatically after 10 days, but if you want to do it right away, you can. For more on getting a good chunk of space back, check out our article: How to Free Up Disk Space Post Windows 10 Upgrade. Recent versions of Windows 10 now include a feature that keeps your disk space in check called Storage Sense. Located in Start > Settings > System > Storage, when enabled, Windows 10 will automatically delete files from locations such as temporary files and recycle bin.
You can make changes to these settings. For instance, I prefer manually deleting files from my Recycle Bin manually. Sometimes Storage Sense might not be enough, you can turn to a third party utility called TreeSize to help find big files that might be hidden on your drive.
Install an Antivirus Utility (if needed)
Windows 10 includes a comprehensive security and health application. If you’re an experienced and responsible PC user, then that’s all you should need. However, if you’re sharing your computer or aren’t as tech-savvy, you’ll want to install your favorite antivirus utility. No one antivirus is 100% perfect, but if you want to compare them, av-comparatives.org is a good place to start.
Create a Recovery Drive and System Image
Now that you have Windows 10 setup the way you like, preserve your investment. Create a recovery drive, and a system image which will allow restoring Windows 10 doesn’t boot or becomes corrupt or hardware failure. For step-by-step guides on creating a recovery drive or system image, check out these articles:
How to Create a Windows 10 Recovery DriveHow to Create a System Image in Windows 10
Install an Offsite Backup Service
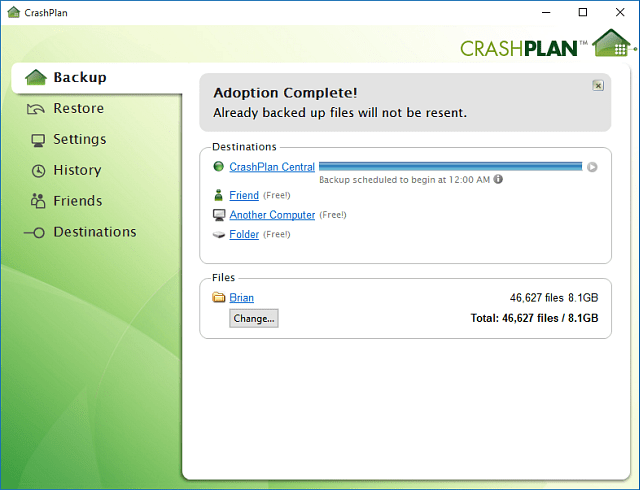
On top of having a recovery drive and system image handy if things were to go awry, you also want all of your important data backing up in real-time. The service we recommend is CrashPlan. It’s simple to use, and will constantly be backing up your data in the background. It really is a true “set it and forget it” tool. And if disaster strikes, you’ll have peace of mind knowing that you haven’t lost anything.
Get started with CrashPlan Now
Adjust Privacy Settings
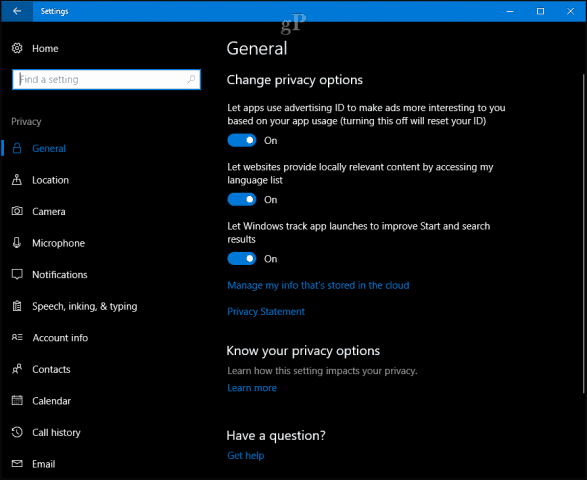
Windows 10 is more transparent about your privacy, providing more information for managing your privacy. Starting with the Creators Update, users can easily choose and change what they share with Microsoft, open Start > Settings > Privacy to review all the options available.
Microsoft is also providing a web-based dashboard where users will have easy access to data such as browsing history, search history, location activity, and Cortana’s Notebook. The privacy dashboard is available immediately to all users—just log into your Microsoft account and click the Privacy tab.
Some users might also want to configure other settings such as Active Hours and Restart Options, including Windows Update settings if you are on a metered connection. Windows Update includes, in particular, includes a broader set of options for users who need more control over updates. Tell us what you think. Did we miss out on anything? What are some of the things you like to configure after setting up your PC? I’ve been working through the ‘facilities’ in Windows 10, and the posts on various forums to create my own version of the ‘do this’ list for windows 10 My fun started with respecifying my Location – I’m not in the USA. And continued to re-installing the printers setup – Yes, I had the DVD’s and new drivers for most of them. Re backup’s —– Maybe start with taking a partition backup (file mode) before installing 10 so I can go back to 7, or just extract individual files from pre-10 days. And – definitely use a cloud mode backup for your data (as in wot-you-typed-in) files – I use Spideroak as I get 2GB space free, the data is encrypted on my PC so what is in the cloud cannot be read without the download, and decrypt keys. It can be run as an all-the-time service, or as a when I want to run it app, and keeps multiple versions of files – handy if I boo-boo and mistakenly delete stuff from a file – and Spideroak will sync data to/between other PC’s – You will need to use the same decrypt keys on the other PC’s. Remember – disaster recovery needs to deal with: Your windows system getting malware. Your partitions being unreadable. Your PC dying and killing the hard drives – both internal, and the backup you were updating when the PC died. A burglary where your PC and all backup drives, DVD’s etc. are taken – and sold to your local ID re-users. (Consider drive encryption and BIOS passwords.) A fire, or flood (whatever) where your place and contents are destroyed – yes, your PC may not be an immediate priority concern – but what is your insurance policy number – credit card numbers, passport number, and even insurer and bank contact numbers. It’s almost horrifying how much data we commit nowadays to the ‘memory’ in our PC and phone, and not our own brain’s. Go on – quote your ISP, and email access accounts, userids and passwords! BTW – what do I have to do to get my Visio and Project programs plus many others after the Win10 hijack process? I have to search through 100’s of CDs/DVDs to get the programs again and do all the reinstalls. You people at Micro$oft need to learn the meaning of OPT-IN doesn’t mean just do it because we already use it. Not sorry for the rant – angry for the thievery perpetrated on MY Property! Now – seeking updates – is that in win-7 mode – going to the latest updated version – or are yuo actually at win-10 installed mode For the win-7 use offline update – as in download a set of all win-7 fixes to-date (maybe 4GB) and apply them from that download – much faster Re win-10 download timings seem to be variable – I suppose depending on the number of people trying to download from the MS site at any time – and enjoy the black (imitating a failed device) screen time – watch the drive usage light flicker. FYI – on my working system now 300GB used of 500GB on a new 2TB drive, upgraded from 3.1 through 75 2K XP 7 & 10, scannow – takes 3 hours + win-10 install took 7 hours + from a DVD and the larger update sessions take – maybe up to 2 hours on a 50Mb link Also – I suspect as an incentive to upgrade – MS have slowed down the access to win-7 entries in their fixes database – probably preparing to remove them same as for the XP ones Comment Name * Email *
Δ Save my name and email and send me emails as new comments are made to this post.
![]()

